(What a monster. Whew) |
m (→Controls) |
||
| Line 132: | Line 132: | ||
** Camera Sensitivity (controllers only): Controls the camera speed while using a controller. |
** Camera Sensitivity (controllers only): Controls the camera speed while using a controller. |
||
** Invert Mouse: Changes how the mouse resonds be switching the Y-axis (moving the mouse up and down) |
** Invert Mouse: Changes how the mouse resonds be switching the Y-axis (moving the mouse up and down) |
||
| + | |||
| + | For a detailed look into the controls, see [[Controls]] |
||
Latest revision as of 04:16, 6 November 2011
Dragon Nest has it's own set of options to play with. There are two option menus: Game Settings and System Settings.
Game Settings[ | ]
The Game Settings menu controls gameplay options, such as Macros and Video Recordings.
Display Tab[ | ]
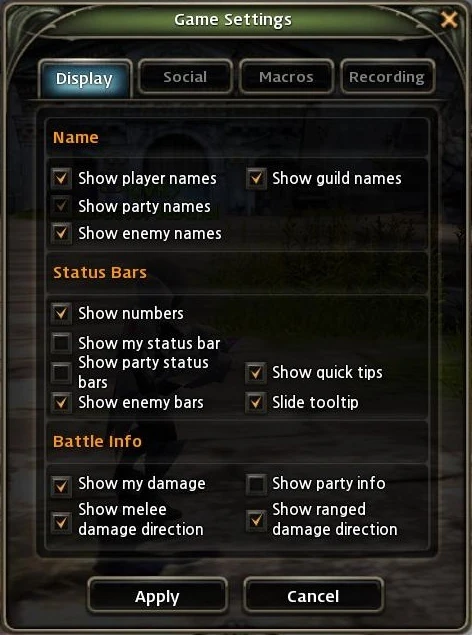
(1) The Display Tab.
The Display Tab controls what nameplates, numbers, and battle text will be show to the player.
- Name: This controls what nameplates the player sees. Nameplates are the various floating text that tells you what the name of the character, other characters, NPC's, and enemies are. You can add or remove: Player Names, party names, enemy names, or guild names,
- Status Bars: Status bars are the HP and MP bars of players and enemies. Also included are the tooltips, which are the popup windows telling you the details of items and skills. You can change: Show numbers on bars, Show the player's status bar, Show the party's status bar, and Show the enemy life bars. You can also turn Quick tips on or off, as well as the Sliding tooltip.
- Battle Info: What information is shown to you while in combat. You can set this to: Show your damage to monsters in the form of flying numbers, Show the melee damage direction (which shows you where the monster that did melee damage to you is), Show the info of your party, and finally the ranged damage direction.
Social Tab[ | ]
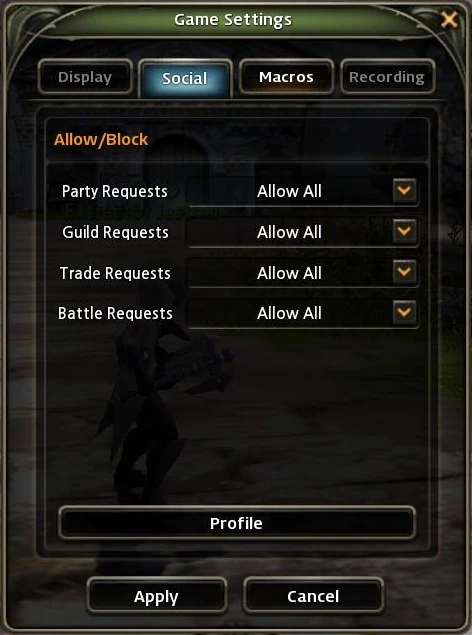
(2) The Social Tab.
The Social tab allows a player to automatically decline invites of a certain kind, and allows the player to write their own personal intro for people to see (or not see if the player so chooses).
- Party Requests: The player can choose to either allow all party requests or to block all party requests. Doing so does not prevent the player from forming parties; nor does it prevent the player from joining a group in the Party Interface however any invites will automatically be declined.
- Guild Requests: The player can choose to either allow all guild membership requests or to block them all. While set to "Block All" the player will not receive any guild membership invites. To join a guild, simply revert the setting to "Allow All"
- Trade Requests: The player can choose to either allow all trade requests or deny them all. As said before, all Trade requests will be denied. However, it is similar to party requests as you can still request a trade with someone else. If both players have it enabled they will not be able to trade with each other.
- Battle Requests: The player can either "Allow All" Battle Requests or "Block All" battle requests. battle requests are similar to duels.
Note that for each of these settings when enabled("Allow All") you will receive confirmation boxes asking if you would like to do so. Setting to "Block All" will remove these confirmation boxes, and send the requester a message saying they were denied.
The Profile button allows you to type a small (53 character limit) paragraph introducing yourself. If you do not select the "Share Profile" checkbox this profile will not be visible to regular players.
Macros[ | ]
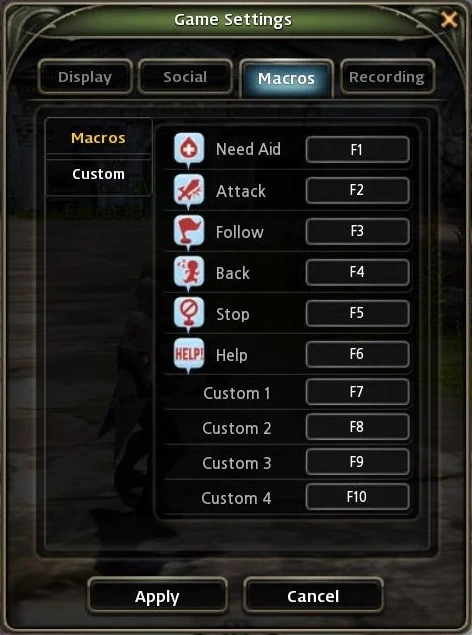
(3) The Macros Tab.
The Macros Tab allows the player to set up quick commands (macros) to announce various things to the party. You can even add up to four(4) custom macros to allow you to send fast messages to your party.
The first six macros cannot be changed at all. All macros will only function in a party.
In the Custom section (not shown) the player can create their own macros that use the F7-F10 keys. These macros must be 25 characters or less in length.
If you wish to reset what the macros can say just click the "Default" button located at the bottom of the Custom section.
Recording[ | ]


(4) The Recording Tab.
Unlike most games, Dragon Nest has it's own built in recording program, which will allow the player to record what they are doing into a movie (Default Keybinding: Scroll Lock).
This menu controls the quality of the movie. The higher the settings the better the movie, however note that it uses a lot of computer power.
- Resolution: The resolution is the size of the total movie, and it automatically set to reduce the size of the video. If the player wishes to change this simply use the drop down and pick whichever option fits best. Note that this option may or may not take into consideration the power of the computer it is on, so use caution when changing this setting.
- Frames: Also know as Frames-per-Second (FPS), this is the speed in which individual frames of the recording are ran. The human eye begins to see still pictures as moving at 30 FPS. There are also 23 FPS and 60 FPS settings respectfully.
- Visual Quality: This controls how smooth and detailed the recording will be. At higher levels this will make the resulting movie look better.
- Audio Quality: This controls how much detail of sounds that the game makes. At higher levels this will make the resulting movie sound better.
Note that when messing with these options that higher settings are for computers that can handle them. This means that if the player's computer is an older model, then that player should use the less powerful settings.
System Settings[ | ]
The System Settings menu controls computer options, such as Sound and Picture quality.
Graphics[ | ]
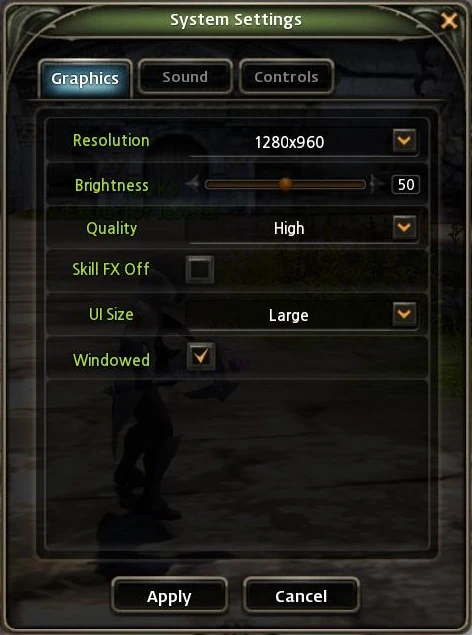
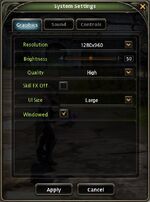
(5) The Graphics Tab.
The standard settings for controlling how the game looks.
- Resolution: The in game resolution of the window. At higher levels, the game becomes bigger. If you computer, graphics card, and monitor do not support a certain level of resolution, then you will not be able to select higher settings than allowed.
- Brightness: Controls how bright the game it
- Quality: Controls how detailed the game it. At higher settings backgrounds become greatly detailed (such as moving bodies of water and grass) and the player's skills will look better. If the player's computer is slow or old it's recommended you choose a lower setting.
- Skill FX Off: Will turn off Skill Effects to increase performance. This includes all skills, and apart from the character performing the skill there will be limited visuals on the skill. This only affects the visuals of the skill but not the sound.
- UI Size: The User Interface (UI) is the frames and menus that allow the player to act within the world. At smaller settings the UI will shrink, allowing a better view of the environment.
- Windowed: Windowed Mode removes the full screen of the game and puts it into a movable window.
Sound[ | ]
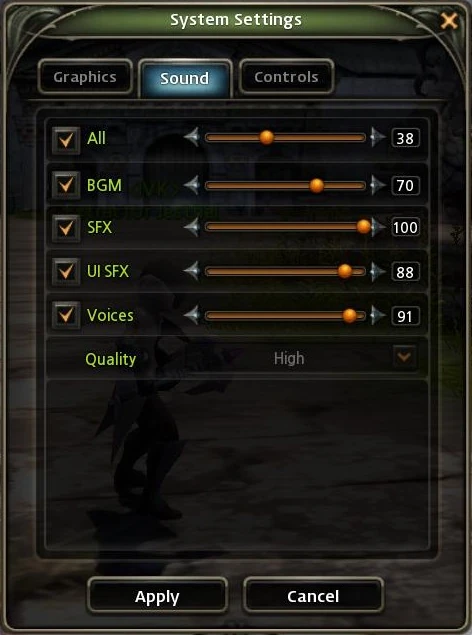
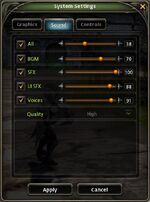
(6) The Sound Tab.
The standard controls for in game music and sound
- All: This is the master volume control and overrides all other settings.
- BGM: Background Music control. Allows the player to change the music in the background.
- SFX: Sound Effects control. Allows the player to change how loud skills and sounds are.
- UI SFX: User Interface control. Allows the player to change how loud the click and movements in the interface are. For instance, pickup up an item or closing a window.
- Voices: When interacting with NPC's they generally have spoken dialog greeting you or talking. The player can control how loud this setting is.
- Quality: Controls the quality of the music and sound from the game.
Controls[ | ]

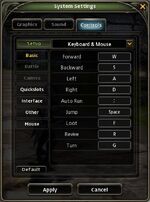
(7) The Controls Tab.
Controls are where a player can set up their own control scheme; allowing them to change keybindings into whatever they choose. Note that mouse buttons are excluded from being used.
At the top of the window there is a drop down allowing the player to switch between a: Keyboard & Mouse, Xbox Controller, or a Custom controller. You can change these settings for each one, and each preset is independent of others.
Note that some options are disabled for the Keyboard and Mouse.
- Basic: These control the basic functions of the character such as movement and loot retrieval.
- Battle (For controllers only, not shown): Allows the player to set the commands that use the mouse. Attacking and Dodging, as well as the Special attack and the Combat Toggle.
- Camera (For controllers only, not shown): Allows t he player to set the camera controls that normally use the mouse. This includes zoom and turning.
- Quickslots (Not shown): These are the slots that allow use of skills and abilities quickly. When changing these settings, it will affect both Combat and Social Toggles, as well as secondary bars.
- Interface(Not shown): Controls the buttons used to open various interface menus.
- Other (Not shown): Controls limited use mechanics like the PvP Info menu and the button to open the Main Menu.
- Mouse (Not shown): These settings control how well the mouse functions. It has a few settings:
- Sensitivity: Controls how sensitive the mouse camera is. At higher settings the mouse will move faster and quicker
- Smart Move: This check box toggles Smart Move on and off
- Expand SM: Expands Smart Move to work even if a player opens a window.
- Cursor Sensitivity (controllers only): Controls the cursor speed while using a controller.
- Camera Sensitivity (controllers only): Controls the camera speed while using a controller.
- Invert Mouse: Changes how the mouse resonds be switching the Y-axis (moving the mouse up and down)
For a detailed look into the controls, see Controls